Emails
Emails is one of the pillars of any web application. We used it for user registrations, password resets, payment notifications, magic links and other notifications. In this section, we will show you how to set up email sending with Resend or Mailtrap.
Resend
For production, we recommend using Resend. It is easy to set up and has a free tier that is more than enough for most projects. If you want to use another provider, feel free.
To setup SMTP follow these steps:
You will then see instructions to add 3 DNS entries at your registrar.
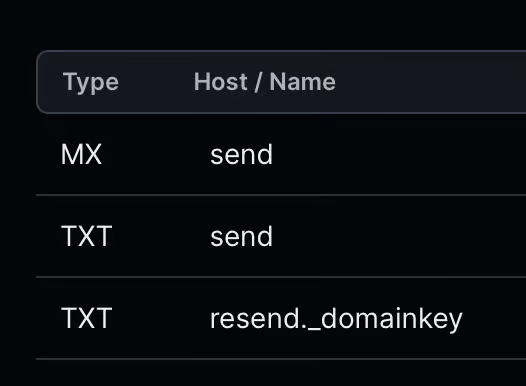
- Copy the entries and go to your domain provider and paste them in the DNS settings.
- After adding the DNS entries, click the
Verify DNS recordsbutton in the Resend dashboard.- It may take a few minutes or hours. You will receive an email notification once the domain verification is completed.
- Update the SMTP settings in the
.envfile:MAIL_MAILER=smtp MAIL_HOST=smtp.resend.com MAIL_PORT=587 MAIL_USERNAME=resend MAIL_PASSWORD=YOUR_API_KEY MAIL_ENCRYPTION=tls MAIL_FROM_ADDRESS="noreply@example.com" MAIL_FROM_NAME="Your App Name"
That's it! You can now send emails from your application.
You might want to test it in your local environment before deploying to production to make sure everything is working as expected.
Mailtrap (Only for local development)
Mailtrap is great option for local development because it allows you to test emails without sending them to real users. It is free and easy to set up.
- Create an account on Mailtrap
- After creating an account go to Inboxes and create a new inbox
- Open up the inbox and you will see the SMTP settings.
- Select Laravel 9+ from the Integrations dropdown and you will see the configuration looking like this:
MAIL_MAILER=smtp
MAIL_HOST=sandbox.smtp.mailtrap.io
MAIL_PORT=2525
MAIL_USERNAME=2cccf012300155
MAIL_PASSWORD=1b995123378294 - Copy the configuration and update the
.env.
You can now send emails from your local environment. Try it out by creating a new user and you will receive an email in your new Mailtrap inbox.